Tutorial

45 Magic Terms That Every Beginner Should Know About

Learn Magic, Tutorial

When you start to learn a new trade or skill inevitably, the first thing you need to know is the language. You need to know the lingo. Without it, you often can’t understand what anyone is talking about, and you don’t know where to start.

Magic has its own weird and wondrous set of terminology. From specific terms for the type of equipment and cards you use to specific names for secret pockets hidden in a magician’s jacket, there are lots of terms you need to know to set your magical knowledge in motion.

Magic Terms for Beginners 

abracadabra word
​Image Via Pixabay.com

Whether you’re interested in becoming a magician yourself, or just fostering some curiosity in your kids, you need to start with a list of basic magic terms. Here are 45 of the best magic 101 terms that every budding magician needs to know.

1. Confederate

No, this isn’t a history lesson. In magic, a confederate refers to a person who is planted in the audience who conspires with the magician to perform an illusion. They are also known as plants, stooges, or shills. They might be present to distract the audience, or to participate in some phase of the trick.

2. Misdirection

This is the foundation of magic. Misdirection is the ability to get the audience to look at something else while you make a secret move. Without misdirection many of your secrets would be revealed. Controlling misdirection allows you to control the audience, and it can take many forms. Misdirection may involve movement, conversation, or even humor.

3. Patter

Patter is the story that a magician tells. It’s the lead-up to the trick. Having patter that is engaging is also a form of misdirection. It will keep your audience concentrating on what you say rather than just watching what you do. It can take many forms like instruction, or it may be posed as a question to the audience.

4. Utility Prop

Majicia Props
​Image Via Pixabay.com

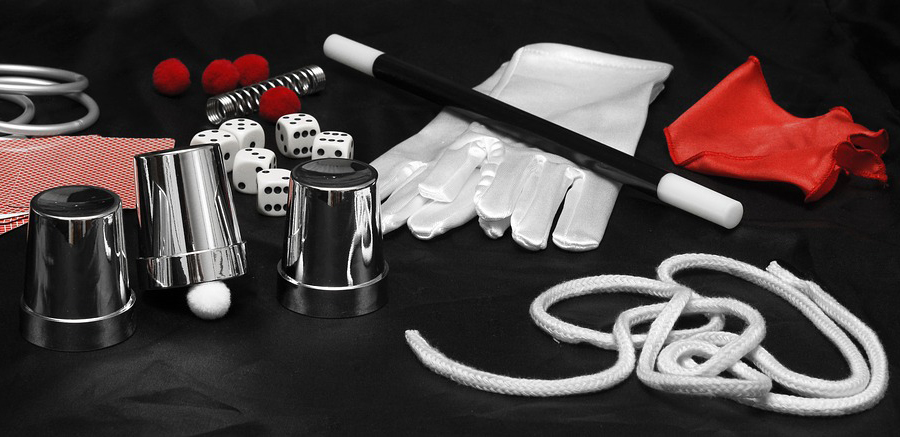
A utility prop is a hard working magic prop that can be used in more than one routine. A length of rope, or a hat are both good examples of utility props because you can use them time and time again.

5.  Moment of Magic

After the lead-up, and the storytelling, and the setting of the scene, the moment of magic is when the cool stuff happens. The moment of magic is when things levitate, or disappear, or morph into something else. It’s also when the audience tends to gasp, or react. For both the audience and the magician, the moment of magic is the best part.

6. Self Working Trick

These are tricks that are easy to perform because they require no skill from the magician. That is no skill other than practice and stage presence. These tricks might employ a gimmick prop like a jacket with a secret compartment or a loaded die.

7. Flashing

Just like in the real world, flashing in magic is not a good thing. It happens when a magician accidentally shows off something that is meant to stay hidden. You might drop a coin that was supposed to stay hidden, or reveal a secret door. The possibilities for flashing are endless, and practice is the best medicine.

8. Blind Shuffle

Shuffle Cards
​Image Via Pixabay.com

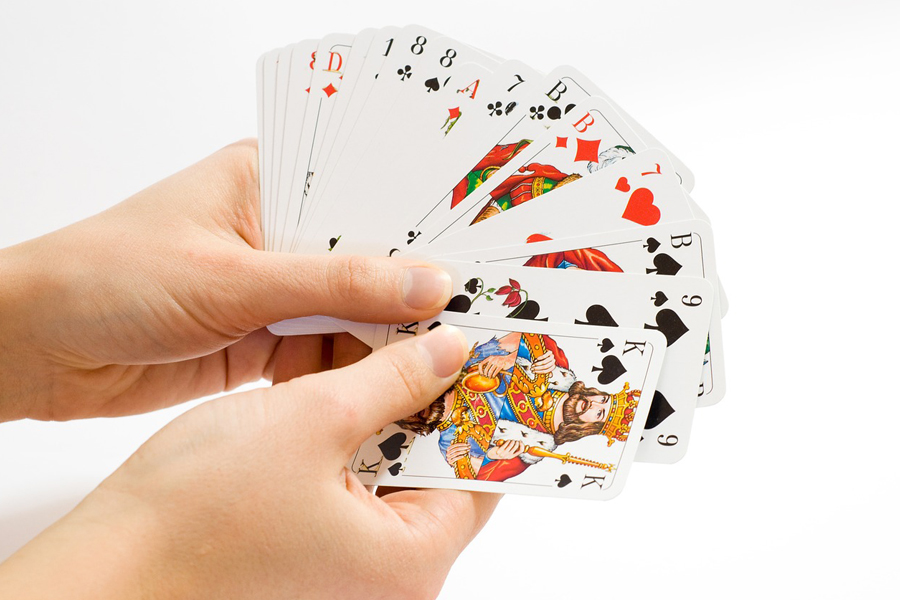
A kind of card shuffling in which you appear to shuffle the cards, but actually leave them in their original position. This makes it much easier to predict the result of a pick a card, any car.

9. The French Drop

This sleight of hand trick is one of the oldest ways of vanishing an object such as a small coin.  To perform it, you hold a coin by its edges, tilted slightly upward in one hand. Then you use your other hand to pretend to take the coin away. In actuality you have just palmed the coin in your first hand.

10. Palming

Majician holding a red small ball
​Image Via Pixabay.com

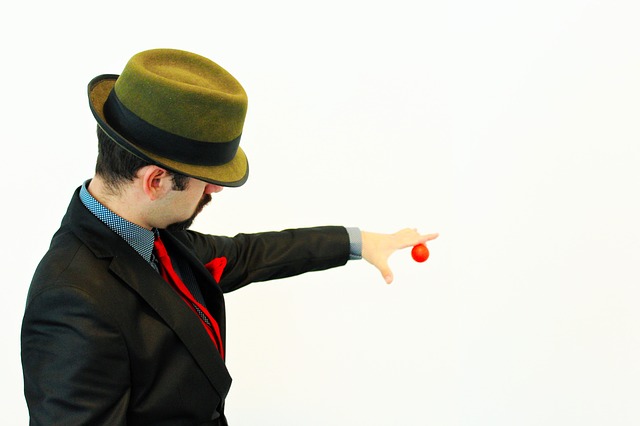
Speaking of palming, this little trick will get you a lot of mileage. In magic, palming is a way of holding, or concealing an object in the palm of your hand. Palming can be used to produce 4 effects. It can be used for vanishing, producing, transposing, and transforming.

11. Locator

A card this is marked in some way that helps you find it. Maybe it’s a card with a texture that is different from the others, or maybe it is a card that is slightly longer than the other cards in the deck. The difference can be achieved in many ways, but the goal is for the locator to stand out.

12. Prestidigitation

This is a fun one to have in your vocabulary. It translates to “quick fingers” and is often used to mean sleight of hand. If you like to work a little vintage magic into your routine, then you will definitely want to give this magic term a whirl. Preferably while you tip your top hat to the audience.

13. Clean

In magic, clean means you have nothing left to hide. Nothing is up your sleeve, except this time you really mean it.

14.  Levitation

The art of making people, or objects appear to float off the ground. Levitation has a long and fascinating magical history, and it relies most heavily on misdirection to achieve its effect.

15. Balducci Levitation

This famous levitation trick was first described by Ed Balducci and was later made popular by David Blaine. The simple illusion is achieved when the magician stands to the side so that the audience only sees one foot clearly.

Then the magician raises up on the ball of the hidden foot at the same time that they raise the visible foot completely off the ground. It’s an elaborate way of standing on tip-toe, but it makes the magician appear to hover a few inches above the ground.

16. Servante

This is a secret compartment on the magician’s side of a table that allows them to secretly stow items. It is a gimmick prop, but it stiller quires the skill of the magician to employ misdirection in order to successfully make use of it.

17. Topit

A topit is a secret pocket in a magician’s jacket that allows them to swiftly hide an object.

18. Sleight of Hand

This is magic that is typically performed with cards, or small objects, like coins. It is less dependent on props or gimmicks, and more dependent on the quickness and skill of the magician.

19. Close up Magic

Cards shuffled in the table
Image Via Pixabay.com

When magicians use the term close up magic they are generally referring to card tricks. Close up magic is magic that is performed within a few feet of the audience. It usually involves sleight of hand and small objects such as coins, or cards. Examples of famous close up magic tricks include palming, the French Drop, and the ever popular among grandparents, detachable thumb

20. Parlor Magic

This term refers to magic that is performed for an audience that is larger than close up magic, but still relatively small. You might not know what a parlor is, so just consider the number of people who could fit in your living room. Parlor magic also usually involves the magician being on the same level as the audience and not elevate as on a stage.

21. Cold

A cold deck of cards is one that is switched in during a trick. It is cold because the deck has not been shuffled. This allows the magician greater control over how the cards are arranged.

22. Angles

In magic, angles refer to the line of sight of audience members. It’s important to know the angles so that you can control what the audience is looking at.

23. Inspection

Inspection is the part of a magician’s routine when the audience is asked to inspect a prop and make sure that everything is as it should be. Audience members might be asked to check that there is no trap door inside of a cabinet, or feel that there are no holes in the hat.

24. Dirty

This magic term refers to when a magician has something hidden in their hands, or when they have appeared to vanish an object by hiding it in their hands.
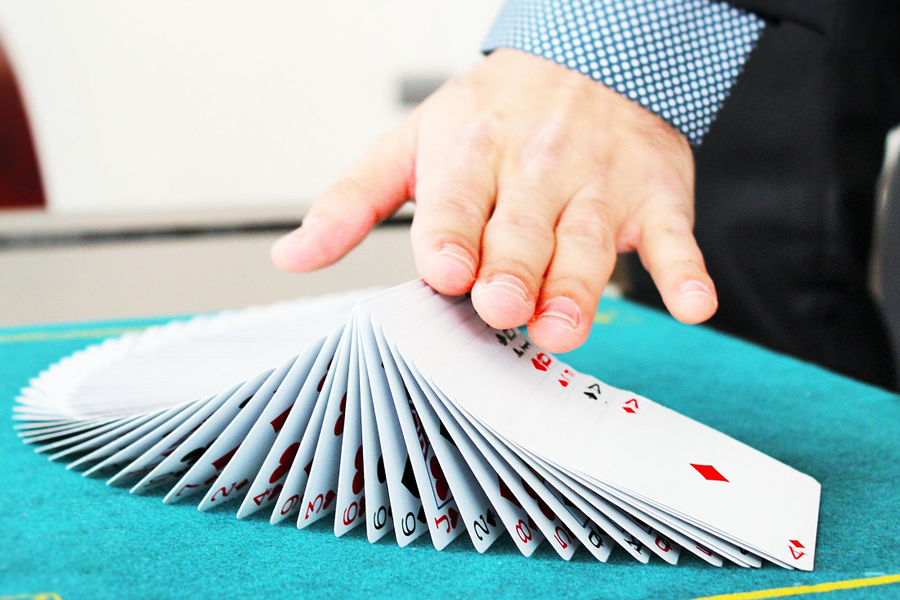
25. Flourish

A flourish refers to the showy way you display your card handling skills. It’s a razzle-dazzle kind of effect.

26. Oil and Water

Oil and water is a card effect that leaves red and black cards separated from one another. While it appears to involve some sleight of hand, it is also a gimmick trick that makes use of some versatile double-sided tape.

27. Ditch

The (hopefully) undetected point at which you get rid of an object like a coin, or a rabbit, or maybe even a person.

28. Effect

In magic terms, the effect is how the magic trick is experienced by the spectator. So you might make a coin disappear by sliding it into your pocket, but for the audience the effect is that the coin has disappeared into thin air.

29. Talking

This is an important magic term to know because it does not mean what you think it means. Talking is not what you do. Talking is what your props do. Talking refers to accidental noises that your props can make that might give away a bit of the magic.

30. Zombie Ball

Stage Magic Tricks Zombie Ball
Buy on Amazon

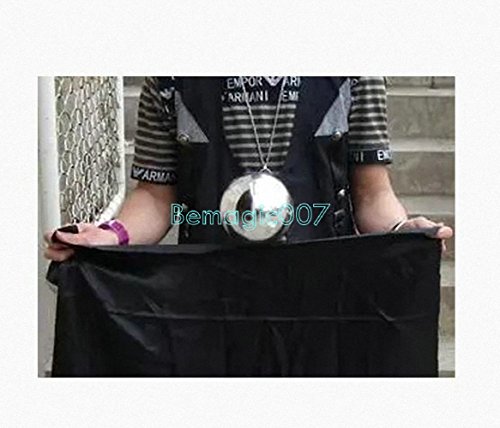
A zombie ball is the term for the large metal ball that magicians levitate under a cloth and then roll along the length of their arm. You’ve probably seen the Zombie ball trick performed dozens of times, and now you know the name.  

31. Mercury Fold

This is a sleight of hand trick in which the dealer, or magician folds a card under the deck undetected. This tutorial here walks you through performing this trick, and it provides ideas for how you might use it throughout your magic routine. Basically, anytime you want to produce a folded card out of nowhere, the mercury fold is your best bet.

32.  Sleeving

A card trick using longsleeve
Image Via Pixabay.com

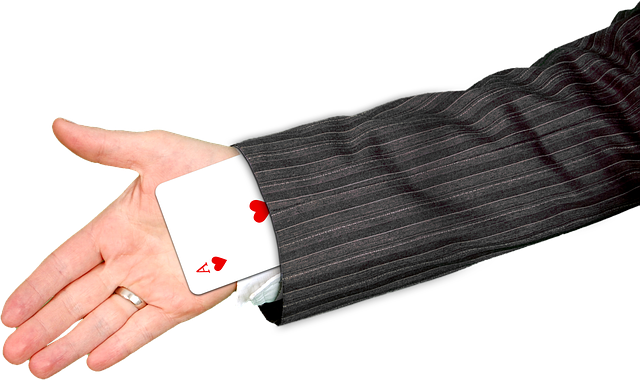
Sleeving is the art of dropping a prop into your sleeve in order to make it disappear. When magicians say there is nothing up their sleeve you can be pretty sure that thanks to sleeving, there most certainly is.

33. Transposition

This category of magic effect is achieved when a magician makes two objects change places with one another. The magician may make objects transpose multiple times within the same illusion, and he or she may even finish by changing the items into something else entirely.

34. Mentalism

Mentalism is performed by people who call themselves mentalists rather than magicians. Mentalists exhibit seemingly highly developed mental powers, such as mind-reading, hypnotism, mind control, and telepathy.

They generally do not like to attribute their success to illusion or trickery, but rather to astute observation, and in some cases, supernatural power.  

35. Mechanic’s Grip

A person who is very good at sleight of hand tricks is often called a mechanic, and a mechanic’s grip refers to the skilled way they hold a deck of cards. Whereas a typical person might hold a deck of cards with their fingers all underneath, or along the edge of the deck, a mechanic will grip the pack with their forefinger on the top. This allows them to have better control over the cards.

36. Impromptu Magic

Impromptu magic does not require a stage, or fancy props. It is magic that can be done with whatever is around you. This is perhaps why you so often see magic performed with everyday objects like coins and paperclips. Magicians use what is commonly on hand.

37. Double Backed Card

Magic Makers Bicycle Red Double Back Deck
Buy on Amazon

This sneaky little piece of magician equipment is a single card that has the design of the pack of cards printed on both sides. It has no face, and it can, therefore, be used to trick the audience in a number of different ways. You can easily find packs of multiple double backed cards like this one here.

38. The Invisible Deck

Invisible Deck Magic Trick, Red or Blue
Buy on Amazon

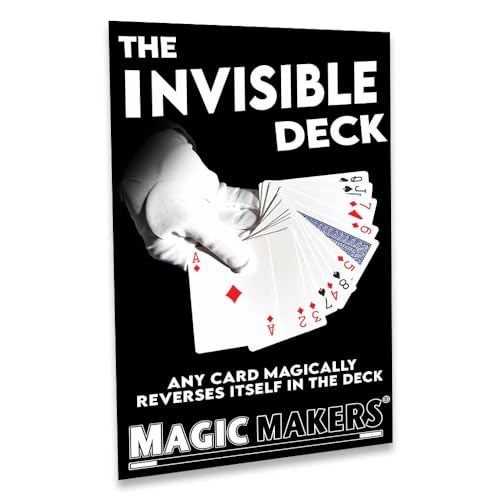
The invisible deck is a utility pack of cards that has a rough and a smooth side that allows the cards to stick together, or slide apart depending on the touch of the dealer.

It is used in the Invisible Deck trick in which a magician appears to be able to predict and produce the exact card that an audience member says, from a pack of unopened cards.

39. Out

You don’t have to worry about getting 3 strikes in magic. An “out” simply refers to an alternate ending to an effect. Magicians might need an out if a prop fails, or if the audience reacts differently than expected.

An out represents the necessity of magicians to think quickly on their feet to preserve the effect.  

40. Stodare Egg

Silk to Egg Magic Tricks
Buy on Amazon

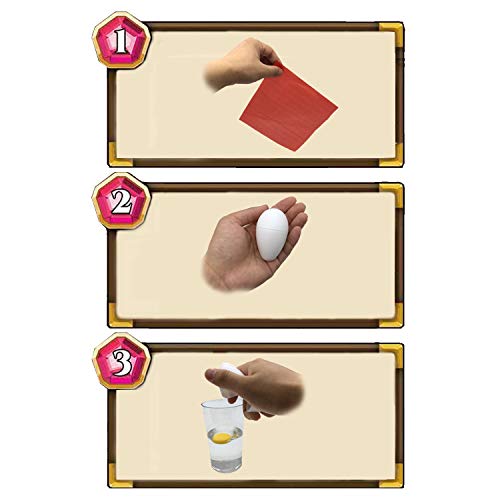
This hollowed out egg is used in tricks to vanish objects such as silks. Many companies manufacture fake eggs, but some magicians, oddly enough, prefer a real egg.

41. Stack

Stacking the cards is a way of arranging them based on the needs of the trick. This is done while shuffling the cards and involves a sleight of hand so as to go unnoticed by the audience.

42. A Thumb Tip

This prop is designed to look like a real thumb, and it fits over a magician’s actual thumb as a way to hide objects. Small objects like coins and silks are pressed into the thumb tip while concealed in the palm of the opposite hand and then magically produced by pulling them from the tip.

43. Dove Pan

No products found.
No products found.

If you’ve ever wanted to pull a dove out of an empty pan, then you need to learn the dove pan effect. With the right prop, you can produce doves or any small bird from out of thin air.

In fact, the possibilities of what you can produce are pretty much endless, as long as it fits in the pan. The secret of course lies in the lid that goes on top of the pan. Its deep brim obscures another pan that can be filled with objects and placed over the existing pan.

44. Gaff

A gaff refers to a gimmick that is meant to look like something real while accomplishing something secret. Magicians use lots of gaffs and the custom cards found here are just one example of how intricate and tricky these props can be in order to keep up the illusion.

45. Magic Dust

Magic dust is simply an excuse for a magician to go into his or her pocket to vanish, or produce an item. If you were performing a trick in which you needed to vanish a coin in your pocket you might explain to the audience that you needed magic dust in order to make the trick work. At least magic dust is one prop you don’t have to purchase.

A Great Foundation for a Love of Magic 

Majician Holding a deck of cards card
Image Via Pixabay.com

This list of magic terms should put you well on your way to getting your magical bearings. You can now read through magician forums and trick instruction books with a foundational knowledge, and a little bit of confidence.

You can engage in conversation with other amateur magicians, and you can seek out more knowledge about specific areas of magic as your interests intensify.

How to Make Liquid Appear into an Empty Glass Cup

Party Tricks, Tutorial

This is an amazing party magic trick you can perform at your next party or casual gathering. It looks impossible, but it’s actually very simple to do. It looks like an advanced trick, but beginners can perform this with just a little bit of practice.

What you will need

  1. 2 identical glass cups
  2. Some liquid to put into one of the glasses. It can really be any drink such as wine, juice, or water.
  3. A small towel just large enough to be able to cover the glass. A good measurement is to measure it is around 1.5 times the size of the cup.
  4. A table.

You need a table for this trick because it involves hiding the other glass in between your legs.

Here is what it looks like, and a tutorial on how to do it.

You obviously do not want to have people standing beside or behind you for this trick. For it to work best, it’s ideal if they are sitting across the table from you.

Benefits of Learning and Doing Magic Tricks

For starters, it is always good to learn! Learning keeps us young, it keeps our brains healthy, and it renews our enjoyment for life.

Teaches Commitment

Learning a new trick is great for learning how to stick with something, and do a skill until you get it down perfectly. Magic tricks are great for learning how to keep yourself in check and commit.

Helps Socialization

Doing magic tricks is a great social thing. Whenever you are unsure of how to fill empty moments at social events, you can always offer to show all present parties what you have mastered.

Boosts Motor Skills

Doing magic tricks leads to a boost in motor skills. Many of us are lagging in the coordination department, but doing magic tricks regularly sharpens our abilities.

Sharpens creativity

Being creative is part of what makes life worth living. Explore through magic!

Very Easy Coin Trick Makes You Look Like a Professional

Coin Tricks, Revealed, Tutorial

How to do the Pinch Vanish coin trick
Coin magic is a fun way to entertain. Since coins are small, most coin tricks are considered close-up magic, as the audience must be close to the performer to see the effects. Coin magic is sometimes performed onstage using large coins. In a different type of performance setting, a close-up coin magician will use a large video projector so the audience can see the magic on a big screen. Coin magic is generally considered harder to master than other close-up techniques such as card tricks. Because coin tricks require great skills and grace to be convincing, and this takes a lot of practice to master.
Still this is one of the easier coin trick for any beginner to learn, and it will amaze your friends and family. You will definitely want to add this trick to your magician’s bag. Learn how to get this trick down pat with help from this how-to video.

First, hold the coin in between your thumb and index finger by the outer edges of the coin. Then press hard till coin falls flat between your two fingers. Practice till the coin falls, and your thumb and index finger are shielding the coin from being seen. Then your left hand comes over, grabs the coin. You can squeeze that coin into oblivion, and it is gone. This is how to do the pinch vanish coin trick.

Your audience will then think the coin has been taken in your left hand. As they watch act as if you are crunching the coin and making the coin disappear in thin air. Open your left hand to show that the coin has vanished. There you go, you have performed the pinch vanish coin trick.

All you will need is A coin

What Is the Purpose of the Joker Card?

Tutorial

Have you ever wondered why decks of cards include the Joker card even if you never use them? At least in my experience with playing cards, the joker is never an important card to keep. In fact, you can usually just throw them out of the deck and continue with your Texas Hold ‘Em or Go Fish game.

What is the meaning of the joker card? Where did the joker card come from? What is the purpose of the joker card?

The joker card is found in most modern-day card decks in addition to the 52 normal cards. The joker card is its own ‘suit,’ and not associated with any of the four suits being clubs, diamonds, hearts, and spades. The joker card can be either extremely powerful or extremely detrimental.

Let us dive deep into the depths of this highly underrated and powerful card.

The History of the Joker Card

Where does the famous or infamous joker card come from? What is the joker’s story?

Who is the joker?

Three A, one Queen, one king and one of picture of Joker

Image Via: Pexels.com

Let us first start with the game of Euchre. Euchre is a trick-taking card game that claims responsibility for introducing the joker card into the modern deck of cards we are all familiar with. Euchre was first introduced in the 18th and 19th centuries, and different versions have been recorded and practiced throughout the centuries. The true origin of the game is uncertain, but some theories lean to the fact it was created from the Alsatian game Jocker.

During the Napoleon era, America modernized Euchre where the Pennsylvania Dutch largely popularized it. This is thought to be true because the euchre term ‘bower’ sounds very similar to the German word Bauer, meaning ‘farmer.’ The game traveled up the Mississippi River by way of Louisiana’s French population.

It is said that in 1850, the joker card was added to playing card decks in the United States for the sole purpose of playing the game Euchre. The joker is considered to originate from the German spelling of Euchre, which is ‘Juker’ or ‘Juckerspiel.’ A British manufacturer named Charles Goddall first started manufacturing packs of playing cards with joker cards in them for the American market in the 1870’s.

The next sighting of the joker card being used was in 1875. The growth spurt of this joker evolution brings the joker to its use of being a wild card.  By the late 1940’s, pairs of joker cards would be the norm for decks of playing cards in America. The American Contract Bridge League was established and grew rapidly as well as the game Canasta, which dominated the 1950’s.

Currently, Euchre is seen mostly in the U.S. Navy and in some American Midwest states.

What Is the Purpose of the Joker Card?

Person hold Card

Image Via: Pexels.com

In a standard deck of cards, there is usually a pair of jokers. Because the joker card is such a versatile and widely misunderstood card, they sometimes represent informal replacements for lost or damaged cards in the 52-card playing deck. This is accomplished by simply noting the lost cards rank and suit on the joker card.

The joker card might just be an easy way to save the hassle of constantly buying and breaking in 52-card decks when you accidentally lose one or damage a card. It also made sense when 52-deck cards were first printed because there was a spare space left on the last sheet of printing, which became the prized joker’s spot in the printed card deck we use so commonly today.

The joker cards play a wide role in the land of playing cards and over the years, its uses have grown exponentially.

Games That Utilize the Joker

The joker card can be seen in many card games throughout the centuries. The first use of the card was for the game Euchre, as mentioned in the beginning of this article. The joker card is considered the highest trump or ‘top bower’ in the historic card game. Next, the joker card was seen used as a wild card in the wildly popular game Canasta in the 1950’s.

Joker card

Image Via: Unsplash.com

The classic card game Gin Rummy uses the joker as a wild card too with the ability to be used as any rank or suit necessary to complete a successful gin. The hugely popular game of War also uses the joker in some means as the highest trump card that beats all other cards in the entire deck. Chase the Joker is a game similar to Old Maid where the joker card is used as a substitute for the ace.

Although it is an uncommon sight, the joker cards are also used in the classic card game of Spades. In this case, the joker cards are used to make the cards deal evenly between players when there are three or six players. They either count as the two highest trumps (the ‘big joker’ and the ‘little joker’) or they are considered junk cards playable anytime that cannot win a trick.

In the classic kid game Go Fish, the joker cards are used to bring the number of pairs to 27 to prevent the case of a 13-13 tie game. Crazy Eights is an exciting game that uses the joker cards as a ‘skip’ card that forces the next player to lose a turn.

The joker’s uses in classic card games have sure seen evolution and versatility throughout the years, and it is a widely exciting topic to uncover the secrets of the joker cards. These are just some of the most common uses of joker cards in popular card games played around the world.

The Meaning of the Joker Card

Wallet and joker card

Image Via: Unsplash.com

The appearance of the joker card stems from the 1860’s when they started becoming standard in a printed deck of cards. The word ‘joke’ was already around at the time and so was ‘joker,’ so Bicycle says that is where the name came from, not the word ‘Euchre.’ It is true, however, that the concept of the joker card came from the game of Euchre discussed above.

When new rules came around with the American version of Euchre, the second joker was added to manage the spot needed for an extra trump card. This card, also called the ‘best bower,’ is the highest trump card in the deck. Some of the joker cards were distinguished between the ‘big joker’ and ‘little joker.’

Americans took the craze to heart and began manufacturing them in American 52-card decks. By 1880’s, the Brits were printing two jokers in their decks, too. The appearance of each joker in the deck was left up to each company’s brand imagery. The use of a jester as the joker became widespread once the label of the “joker” became universally used.

The Jester

Casino coin and Joker card

Image via: Unsplash.com

The different jokers and jesters have had different meanings throughout history. For example, to distinguish the two jokers in a deck, the black joker is said to correspond to the Fool card of the Tarot deck and the red joker is said to correspond to the Magician also known as the juggler.

The Juggler and the Fool in the Tarot deck are both pretty similar but have small discrepancies in their appearance. In a Tarot deck, the Fool is very close to the same thing as the joker.

In a Tarot deck, the Fool is typically used as the highest trump card since the 1400's. The joker on the other hand, was not introduced into the Tarot deck in recent years. This means that the modern-day image of the joker could have been inspired by older Tarot appearances of the fool.

Power of the Joker

As you can tell from its immense and colorful history, the joker card has played a gigantic role in card playing for centuries. The joker has a great amount of power, and since the beginning days, it has held the highest ranking in a lot of card games. The power of the joker is not ironically held in a comic manner but a manner of helping card players win the game.

Ironic, huh?

From its use in Euchre in Europe to its evolution in America, the joker has always held significant meaning in the world of cards. Rummy uses the joker -- even Go Fish uses the joker. Maybe the joker is your new favorite card of the deck. It sure is ours.

How To Solve A Rubik’s Cube Instantly (As a Magic Trick)

Party Tricks, Penn & Teller, Performance, Revealed, Stage Magic, Tutorial

Solving a Rubik’s cube is no simple task. Solving a Rubik’s cube takes a good deal of patience and effort for most people. Have you ever tried to do it? According to FunTrivia.com, it takes an average of 48 to 100 tries to solve a Rubik’s cube. If done correctly, it can be solved in 17 turns. Knowing how to solve a rubik’s cube and do a few magic tricks can be a fun and impressive skill to show at a party. Some people have combined the two, for jaw-dropping entertainment.

History of the Rubik’s Cube

To completely understand how to solve a Rubik’s cube, you must know about its purpose and construction. In this section, I will provide you with a brief history of the Rubik’s cube. Believe it or not, it was never intended to be a toy. The Rubik’s cube was invented in 1974 by a Hungarian architect, Erno Rubik. What was its intended function? It was meant to serve as a three-dimensional model to explain geometric principles.

After designing this magic cube, he realized he could not solve it. As he moved the colored squares, he said: “It was a code I myself had invented! Yet, I could not read it.” Having nine colored squares on each side, the cube can be arranged in 43 quintillion ways (forty-three followed by eighteen zeros). It took him one month of rearranging the corners of each side to solve the puzzle. Since he was living in Hungary behind the Iron Curtain at that time, it took a few years for the puzzle to reach the market. In 1979, it was shown at the Nuremberg Toy Fair and spotted as a hit. In 1980 and 1981, it won Toy of the Year in the UK. By January 2009, it has sold more than 350 million copies, making it the greatest-selling toy of all time.

How to Solve a Rubik’s Cube

Have you experienced the frustration of holding a Rubik’s cube in your hands and being unable to solve it? Don’t worry too much about it. Whether you want to impress your friends with a fun party trick or close the chapter on that childhood curiosity, this guide will walk you through the simplest way to solve the puzzle.

An important thing to note when it comes to how to solve a Rubik’s cube is that it is not always easy. Sometimes, you may need to spend several hours attempting to solve it. However, if you would rather solve the cube in your hand than be able to solve any that are given to you, there are many informative articles and videos on the internet. The satisfaction of solving it is one of the best feelings. Are you interested?

Here is the first thing you need to know. There is an algorithm associated with how many turns are required to solve the cube. These turns can be represented by letters. The algorithms are combinations of moves that rotate pieces to get them where you want them. The puzzle has six sides (or faces) all of which can be turned individually – whether it be up or down, left or right, or front and back.

The common notation for these is U, D, L, R, F, and B. These faces can be turned in three different directions: U refers to turning the upper face clockwise, U’ is a counter-clockwise turn of the upper face, and U2 refers to half of a turning the upper face either direction. The apostrophe denotes a counterclockwise rotation for any of the notated movements. An advanced notion includes turns of the middle layers, double turns, and rotations. However, these won’t be needed in this guide. Now we will look at step one, the cross.

Step One: The Cross

Alright, here is the first step for how to solve a Rubik’s cube. This step can be confusing to understand at first. To gain a clear picture, you may need to read through and practice it several times. As you may have noticed from playing with the cube, the centerpieces cannot be moved, only rotated. While this may seem frustrating, you can use it to your advantage. Build the cross around the white sticker center. Many online guides start with this as the base, so even if you get confused during the process, you can look up demonstrations with a similar model online.

first step - how to solve a rubik's cube

The first step you need to accomplish is to get the white cross on top of the cube. Don’t worry about matching the centerpieces just yet. For now, focus on getting the white edges to the top layer. Next, flip the edges of the squares so that the white stickers are facing up and form a plus. Hold the cube so that the edges that need to be flipped are facing you. Then, use the algorithm: F, R, D, R, F2. This algorithm flips the edges so that the white parts face upwards. Do this for all of the edges until you have a white cross on top.

white cross on top - how to solve a rubik's cube

Next, you will need to orient your pieces. Look at the edges of the Rubik’s cube. Are none of the pieces matching? Perhaps two pieces are matching or maybe even all of them are. If your piece has all four edges matching the centers, you have solved the cross. If none of the edges are matching, perform a U move and then take another look at the cube. You want to have at least two edges matching. If none of the edges are matching, do another U move. Repeat this algorithm until you have either two or four edges that match the center.

umove - how to solve a rubik's cube

Step 2: The White Corners

Now that you have completed the edges of the white face, all that you have left are the corners. This step is much simpler than the first, as it only requires one algorithm to complete. Take a look at the bottom layer of the puzzle. You want to locate the white, orange, and green corner. Statistically speaking, there is a fifty percent chance you will find this on the bottom of the cube. Follow these steps depending on where you locate the white, orange, and green corner.

Here is What You Should Do if You Find it on the Bottom Layer: If the green, white, and orange corner are on the bottom layer of the puzzle, use the required D move until the cube looks as pictured below. The required algorithm is as follows: R, D, R, D.

whitecorner - how to solve a rubik's cube

Here is What You Should Do if You Find it on the Top:

If the green, white, and orange corners are on the top of the Rubik’s cube, turn the cube to face you until the colors look like this picture below. Then, perform the R, D, R, D algorithm as many times as needed. Repeat this process until you completely solve the top layer. Start with the corners on the bottom, as this might save you a couple of unnecessary turns.

finditonthetop - how to solve a rubik's cube

Middle Layer Edges:

Now, you are on to step three on how to solve a Rubik’s cube. Now that you are finished with all of the white pieces, you are ready to move on to flip your cube so it is all white on the bottom. Look for a piece on the top of the cube that is not yellow. Use a U move so that the color on the edge’s front face matches that of the center. It could go either left or right. Repeat this process for all four of the middle edges.

middlelayeredgesleft - how to solve a rubik's cube

Left

middlelayeredgesright - how to solve a rubik's cube

Right

Step 4 Yellow Cross:

You are now two-thirds of the way through the puzzle. Every piece left to be solved has yellow on it somewhere. Now, we are going to solve the edges of the top layer in two steps. The first of the two steps involves orienting all of the yellow pieces so that they are all facing up. The second step involves moving these pieces around and thus solving the puzzle. Are you ready?

Ignore the corners at first. Look at the edges only. Are they oriented correctly? Here are the possible edge positions that you can have:

yellowcross - how to solve a rubik's cube

Are your edges currently solved in a cross pattern the way that we began this process? If so, you can go on and skip this step. If not, listen carefully. Besides the cross shape, it is possible to have a dot, L-shape, or a line as pictured above. To speed up the process, perform the following algorithm: F, U, R, U’ R’, F’.

Now, you should have an L shape, where the two yellow pieces that are showing are adjacent to one another. Complete the necessary number of U and U’ shapes to achieve this picture. Then, perform the following algorithm: F, R, U, R’, U’, F’. The four edges should now be oriented correctly.

Step 5: Sune and Antisune

Don’t be off-put by the names. Sune and antisune are beloved by many puzzlers due to their simplicity. After you have oriented the edges, there are seven different corner positions available to you. Sune and antisune are two of these which we will discuss in a minute. This is what your Rubik’s cube should look like by step five.

Sune and antisune - how to solve a rubik's cube

How do you get to the spot where you only need to orient one more corner? Follow this algorithm: R, U, R’, U, R, U2, R’. When you get to this desired spot, there are two variations that can occur. They will look something like this:

how to solve a rubik's cube

This is sune and antisune:

Sune and antisune algorithm2 - how to solve a rubik's cube

The yellow front-facing corner can be in two positions. It can face either the front or the right. In the first image above, the yellow is facing the front. This means that you have a sune position. To solve sune, do the aforementioned algorithm one more time to solve the top layer The antisune position occurs when the right-facing corner appears as it does in the second picture illustrated above.

Step 6: Finish the Rubik’s Cube

We are almost there! Hang on. Step six is the last part to solve the cube. While there are twenty-one cases for the top layer, we only need a few algorithms to figure them out and get it all sorted. First, we want to locate the headlights. The term ‘headlights’ refers to two corners that have the same color on one side. There are only two cases without headlights. For the case without headlights, perform the following algorithm from any angle: R’, F, R’, B2, R, F’, R’, B2, R2. At this point, you should have either finished the Rubik’s cube or a pair of headlights on every side of the puzzle.

After you performed the above algorithm in step six, there are five possible positions that your cube can be in now. Perform the necessary amount of U moves to ensure that each corner is in its right place. Do you have a completely solved bar? If so, perform the following algorithm and make sure that the bar is at the back: R, U’, R, U, R, U, R, U’, R’, U’, R2. If your cube is still unsolved, perform the above algorithm one more time, keeping the completed bar at the back of the cube. If you do not have a solved bar, you can perform this algorithm from any angle that you would like to. This will give you a solved bar and then you can do the algorithm one more time in order to complete the puzzle. Congratulations, you have completed the cube!

Magicians and a Sleight of Hand

A few days ago, we were watching Penn and Teller’s hit TV show, Fool Us. On this show, magicians are given the challenge to trick two of the greatest minds in magic, Penn and Teller. A magician named Steven Brundage performed a magic trick using a Rubik’s Cube that blew away the audience and fooled two of the greatest minds in magic. You might be wondering ‘How is a Rubik’s Cube used in magic?’ The classic Rubik’s Cube magic trick is to solve it instantly… faster than humanly possible. The magician literally throws the toy (randomly mixed) into the air and by the time he catches it, it’s solved.

This is what it looks like:

Believe it or not, this is actually one of the simpler magic tricks to accomplish. The action involves the magician first taking a scrambled cube and showing it to the audience. Then, he attempts to solve it before throwing it up in the air. When he catches it, the Rubik’s cube is solved. So how is this trick done? There are actually a few ways to perform this magic trick.

How exactly did he do it? We’ve done our research and there are several common ways that a magician solves a Rubik’s cube instantly. We’ve broken them down in the sections below. Read through each of the possible methods and see if you can identify which one he used. We have to say that we are particularly impressed with Steven Brundage. Even after some heavy duty research, we’re still not exactly sure how he pulled it off. See if you can figure it out.

classic rubiks cube magic trick

As you can see, it’s solved instantly.

Here’s the full performance:

The Classic Rubik’s Cube trick revealed

Here’s the tutorial on how the basic trick works.

How to Solve a Rubik’s Cube with Magic Instantly Explained:

Method 1:

The first one involves using a fake Rubik’s cube. When it is solved, one of the sides appears to be scrambled. This is not possible to do on a normal Rubik’s cube. By carrying out six simple moves on the cube, the cube appears to be completely scrambled. Using this cube, you can show the audience all sides. Then, hold the scrambled side facing the audience and undo the six moves you previously did, pretending to solve it. With a slight sleight of hand, the audience will believe they have seen all of the sides.

Method 2:

The next most common magic trick involves taking a mixed up Rubik’s cube, showing it to the audience, and then putting it inside of a paper bag. After the cube is taken out of the bag, it is solved. How can this be? Popular opinion is that this trick is a gimmick. In every performance with this trick, the paper bag is immediately thrown away without the audience being able to get a second look at it.

Method 3:

This is the most likely speculation for how Brundage could have pulled off the magic trick. In his live performance, he scrambles his own Rubik’s cube while speaking to the crowd, leaving the selected one untouched. Brundage then asks Teller to hold the cube in his hands. When he opens his hands, the cube matches the one that Brundage had scrambled. Brundage performed a set of moves on one cube and then repeats it on the scrambled cube while talking to the audience later on. While this sounds highly plausible, there is one thing wrong with this method. The theory would not work unless Brundage already knew which cube Teller would choose from the two that were scrambled. It is highly likely he had a plan for both cubes but we cannot know for sure.

Now that you know each of the magician’s methods used to solve a Rubik’s cube, let’s go back and watch Steven Brundage perform one more time. As you can see, it’s solved instantly. What an amazing sleight of hand! If you look at it over and over, you can see that he actually makes 4 moves. Did you catch it? Watch carefully. It’s extremely quick.

The Classic Rubik’s Cube trick is revealed:

Here’s the tutorial on how the basic trick works. As you can see, it’s a gimmick cube. That’s the classic way that the trick is done. However, Steven does not use a gimmick cube for his routine. He could perform that trick with any Rubik’s Cube according to his interviews. Steven states that there was no switching going on. That means: There weren’t extra trick cubes hiding behind the table that he was switching around. He states: “With all the being said… Yes, I am extremely good with Rubik’s Cubes.”

The classic Rubik’s Cube technique makes a lot of sense. He does say in his interview that if he were to use trick cubes, every one of his tricks would look identical as they did when he wasn’t. But even as he points out these subtle hints, it’s impossible to tell just how he performed this trick without a gimmick cube. Thanks to PerryThePly, a reader of Rebel Magic for sending in this update! He’s found something that gets us closer to understanding how this trick is done.

Thanks to PerryThePly, a reader of Rebel Magic for sending in this update!

He’s found something that gets us closer to understanding how this trick is done.

See also:

How To Hypnotize Someone (Powerful Techniques)

Easy Magic Tricks You Can Learn Today

How to Do The Double Lift